Top Picks


Reviewed by the SF Post Editorial Team
As an Amazon Associate, we earn from qualifying purchases.
Last Updated: June 2026 | Written by the SF Post Editorial Team
> "Forty-five minutes. One wrench. Zero plumbers. And a skeptical cat as my only witness."

Look, I'll be honest with you. The first time I installed a bidet attachment, I was absolutely convinced I was going to flood my bathroom. There I was, wrench in one hand, a YouTube tutorial paused mid-sentence on my phone, and a deeply unimpressed tabby cat judging me from the doorway like she'd seen this movie before and it didn't end well.
Forty-five minutes later? The thing worked. No leaks. No flood. No emergency call to a plumber. And I've been a passionate convert ever since.
The 30-Second Answer (For the Scrollers)
If you're wondering how to install a bidet attachment without calling a plumber, here's the short version:

> Most non-electric bidet attachments install in 15 to 30 minutes using only an adjustable wrench. Shut off the water, drain the tank, remove the toilet seat, slide the bidet plate underneath, reattach the seat, splice into the water supply with the included T-valve, and turn the water back on. That's the entire job.
But the details matter. A few small mistakes can turn a simple swap into a soggy Saturday afternoon you'll be telling stories about for years (and not the good kind).
After installing four different attachments across two homes — and helping my sister-in-law tackle hers — here's everything I wish someone had told me before my first attempt.
By the Numbers: Why Bidets Are Having a Moment
| The Stat | Why It Matters |
|---|---|
| 15–30 min | Average install time for a non-electric attachment |
| 1 tool | All you need is an adjustable wrench |
| $30–$100 | Typical cost for a quality bidet attachment |
| ~80% | Reduction in toilet paper use after switching |
| 0 | Plumbers required for this job |
The Problem: Why Most Beginners Hesitate
Most people I talk to assume bidet installation requires soldering torches, pipe cutting, or at minimum a working knowledge of plumbing that could earn them a trade license.
It doesn't. Not even close.
A non-electric bidet attachment simply piggybacks on the existing cold water line that already feeds your toilet tank. You're not running new pipes. You're not cutting into walls. You're inserting a T-valve between the shutoff and the tank — a job a careful teenager could handle with one tool and a free afternoon.
The real obstacles for beginners are almost always these three:
- Not knowing what size your toilet's water connection is. (Almost always 7/8 inch on the tank side and 3/8 or 1/2 inch on the supply side in the US.)
- Forgetting to drain the tank before disconnecting the supply line. (Hello, ankle-deep puddle.)
- Overtightening plastic fittings and cracking them. (The silent killer.)
Watch It Done: Install a Bidet in Under 5 Minutes
Sometimes seeing it done beats reading about it. Watch this quick walkthrough, then come back and we'll go deeper on the details that matter.
Tools and Materials: The Pre-Flight Checklist
Before you start, gather everything. There's nothing worse than discovering you need a wrench when the water's already off and your toilet is in pieces. Trust me on this.
Your Essential Kit:
- An adjustable wrench (or a sturdy pair of pliers in a pinch)
- A small bucket or large towel to catch residual tank water
- Plumber's tape (Teflon tape) — optional but highly recommended
- The bidet attachment kit (should include T-valve, supply hose, and mounting hardware)
- A flashlight if your toilet sits in a dim corner
Step-by-Step: Install Your Bidet in 7 Easy Moves
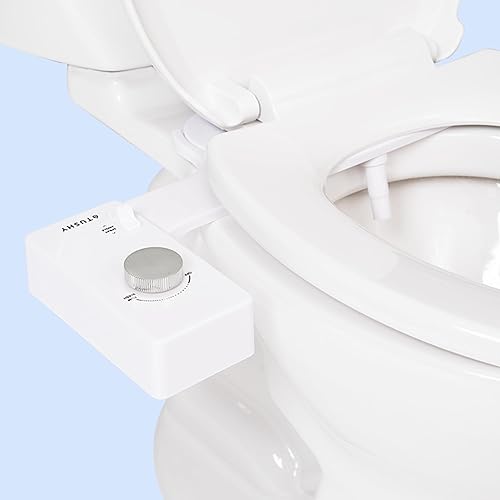
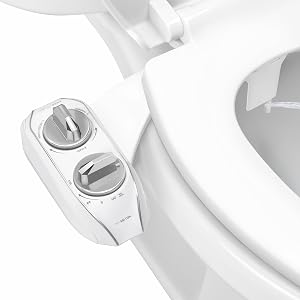
This is the exact sequence I follow every single time. It works for nearly every non-electric attachment on the market — Tushy, Luxe, Brondell, Bio Bidet, you name it.
Step 1: Turn Off the Water Supply
Find the shutoff valve on the wall behind or beside your toilet. It's a small oval or football-shaped knob. Turn it clockwise until it stops.
> Heads up: If your valve is corroded or refuses to budge, stop immediately and replace it before going further. A stuck shutoff is a problem you want to discover now — not when water is spraying across your bathroom like a budget action movie.
Step 2: Flush and Drain the Tank
Hold the handle down to drain as much water as possible. Then sponge or towel out the residual half-inch at the bottom.
Skipping this step means the leftover water dumps onto your floor when you disconnect the hose. Ask me how I know.
Step 3: Disconnect the Existing Supply Hose
Use your wrench to loosen the nut connecting the supply hose to the bottom of the tank. Have your bucket or towel ready — some water will drip out no matter how religiously you drained the tank.
Step 4: Remove the Toilet Seat
Unscrew the two bolts holding your seat in place. On older toilets, these bolts can be stubborn — a quick spritz of penetrating oil works wonders.
Step 5: Position the Bidet Mounting Plate
Slide the bidet attachment plate onto the rim of the toilet bowl, aligning the holes with your seat's mounting points. Most modern attachments fit standard bowls — just check elongated vs. round before you buy.
Step 6: Connect the T-Valve and Hoses
Wrap two to three layers of plumber's tape clockwise around the threaded fittings. Install the T-valve where the supply hose used to meet the tank. Connect:
- The original supply hose to the top of the T-valve
- The new bidet hose to the side of the T-valve
- Reattach the supply line to the tank
Step 7: Turn the Water Back On — Slowly
Reopen the shutoff valve slowly — about a quarter-turn at a time. Watch every connection for drips. Let the tank refill, flush once, and inspect again.
No leaks? Congratulations. You just joined the bidet club.
Expert Tips From Someone Who Has Made Every Mistake
> ### Tip #1: Test the Spray Before Sitting Down > Hold a towel over the nozzle and turn the dial. Some attachments come out of the box with the pressure cranked to "power-washer." Discovering that the way nature intended is a memory that doesn't fade.
> ### Tip #2: Photograph Everything Before You Disconnect > Snap a quick photo of how your supply line is currently configured. If anything goes sideways, you have a reference for putting it back exactly as it was.
> ### Tip #3: Cold Water Is Just Fine > First-timers worry about the temperature. Within a week, you won't even notice. Your body adapts faster than your brain expects.
> ### Tip #4: Don't Cheap Out on the Attachment > The $20 bargain-bin specials use plastic fittings that crack within a year. Spending $40–$80 buys you brass components and a multi-year warranty.
Common Problems (And How to Fix Them in 60 Seconds)
| The Problem | The Fix |
|---|---|
| Slow drip at the T-valve | Add more plumber's tape and re-tighten gently |
| Spray is too weak | Open the dedicated bidet shutoff fully; check the inline filter |
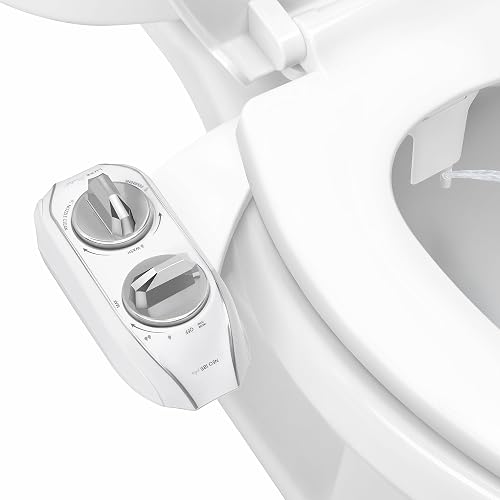
| Spray is too strong | Almost all attachments have a pressure dial — turn it down |
| Seat sits unevenly | Loosen seat bolts, reposition, tighten in alternating turns |
| Hose makes a hissing noise | Cross-threaded fitting — disconnect and start over |
The Bottom Line: You've Got This
Installing a bidet attachment is one of the most satisfying 30-minute home upgrades you can make. The cost-to-quality-of-life ratio is genuinely absurd. You'll save money on toilet paper, reduce your environmental footprint, and — let's just say it — feel cleaner every single day.
The only real regret most people have? Not doing it sooner.
So grab that wrench. Cue up your favorite playlist. And get ready to wonder how you ever lived without one.
> "The best home upgrade I've made for under $50. I tell everyone who'll listen." — Every bidet convert, ever.
Have questions or run into a snag during your install? Drop us a line — our editorial team reads every email and we love troubleshooting bathroom puzzles. Happy installing.
Key Takeaways
- Choosing the right how to install a bidet attachment means matching capacity and output ports to your actual devices
- Always check actual watt-hours (Wh), not just watts — runtime depends on Wh, not peak output
- Also covers: bidet installation guide
- Also covers: DIY bidet setup
- Also covers: bidet attachment instructions
- Compare price-per-Wh across models to find the best value for your budget